Page 2 of 4 FirstFirst 1234 LastLast
Results 21 to 40 of 65

Thread: The Tobacco Plant Project

  1. #21
    Join Date
    Mar 2008
    Location
    around
    Posts
    2,861
    Blog Entries
    16

    Default

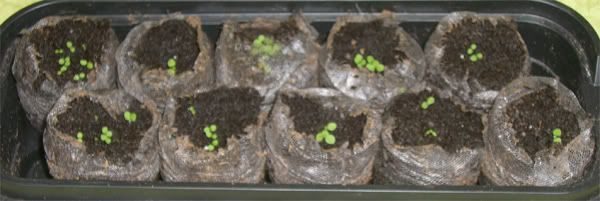
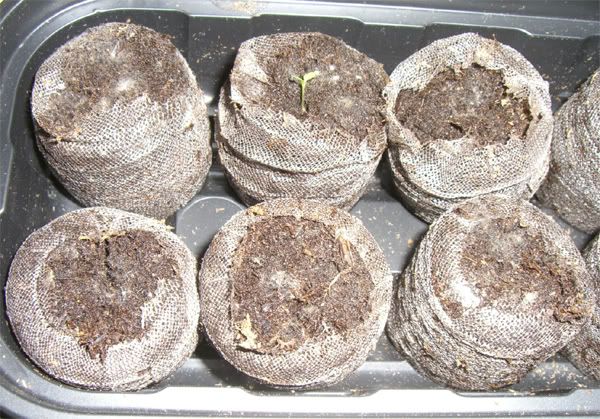
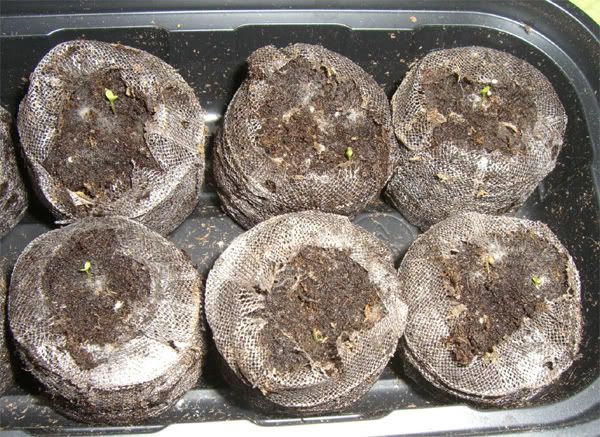
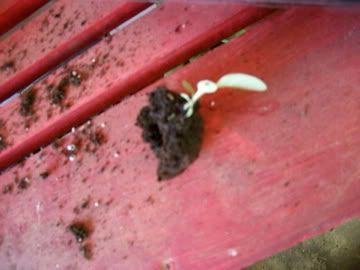
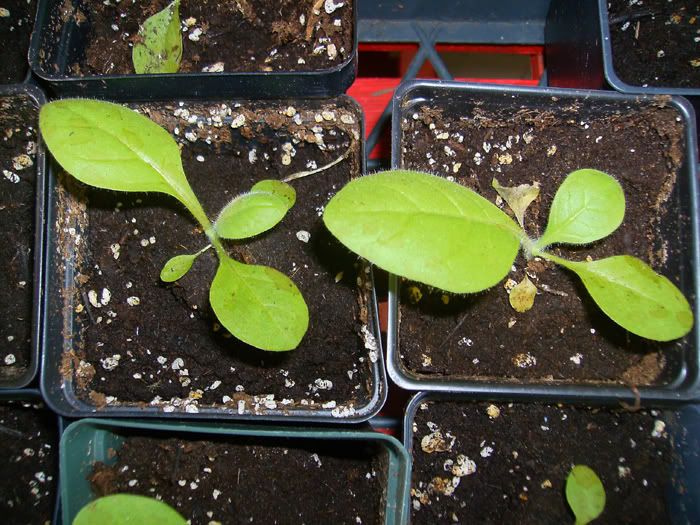
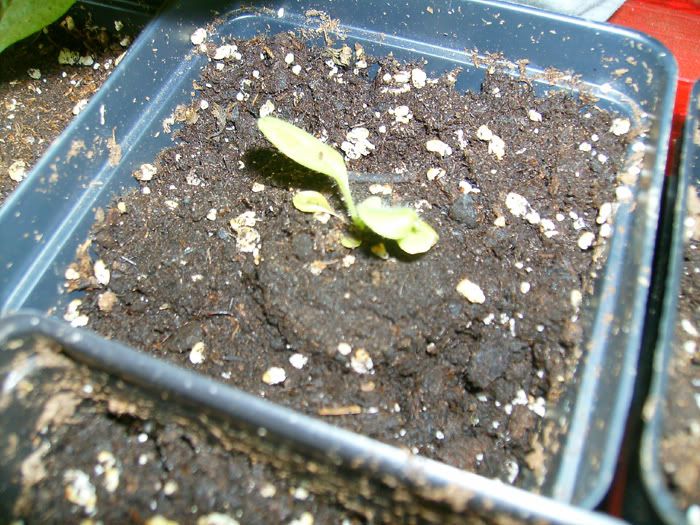
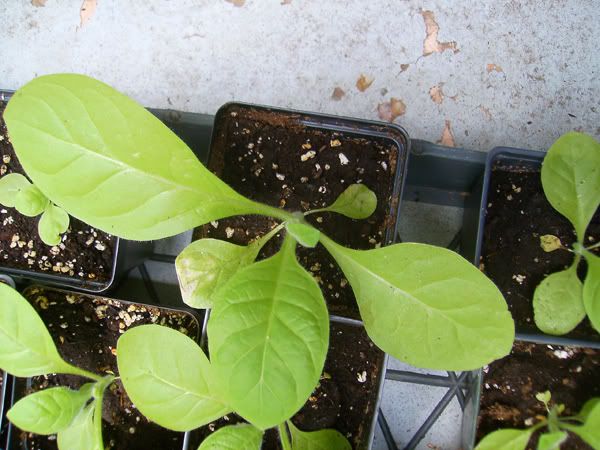
    ....and we have germination. Very very tiny plants have started to grow of each variety. Not all of the seeds have started sprouting, and I can't reiterate how tiny these are. I'll take some pictures for reference a bit later on today.

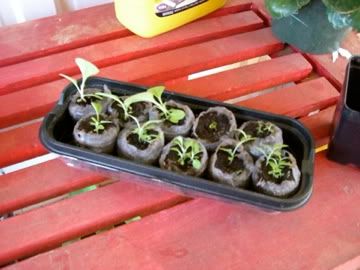
    I've been checking these plants every day since I planted them. I put them in the peat pots (actually, just on top of the peat pots) on Monday, March 8th, in the evening. I noticed that they were sprouting last night, right at the 10 day mark. I haven't watered them since I planted them. They certainly aren't dry, but they definitely aren't as moist as they were when I started. I'm going to add a little bit of water to both trays today; I may fertilize with a 10% solution this weekend. I'm just going to mist the fertilizer on with this little hand-spray mister we have.

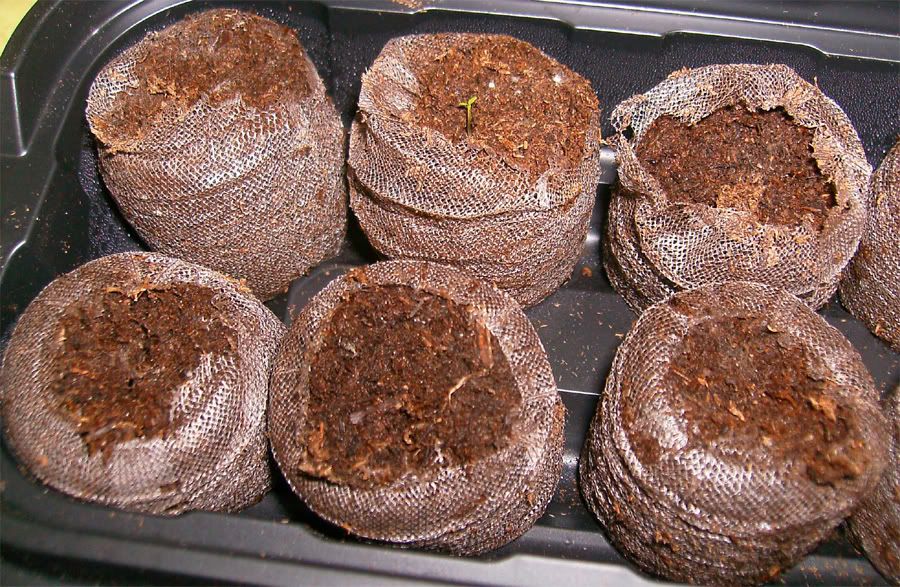
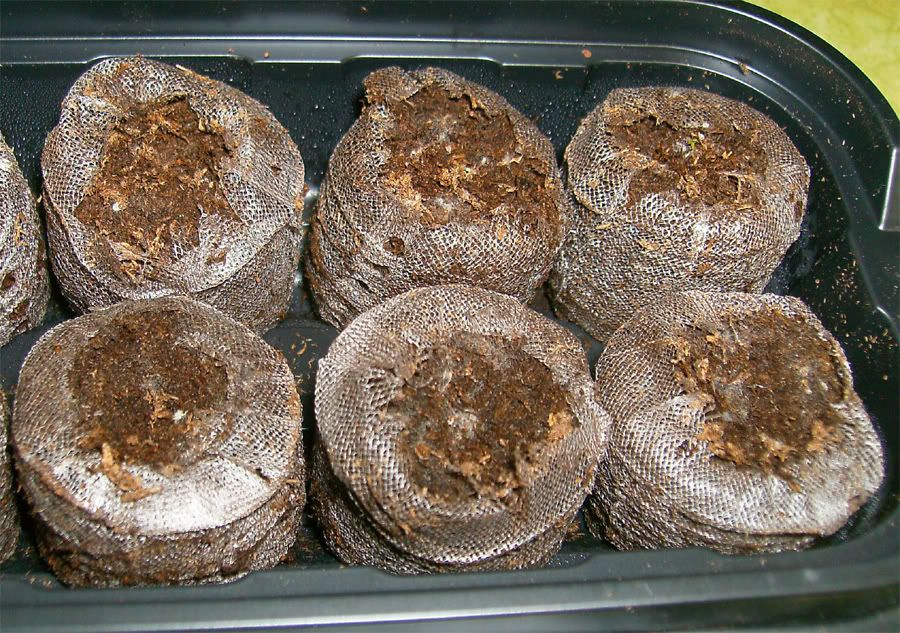
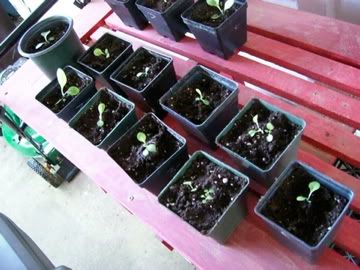
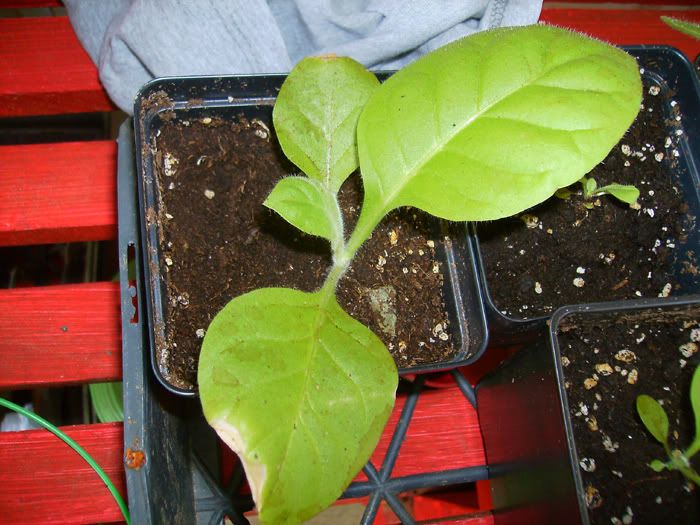
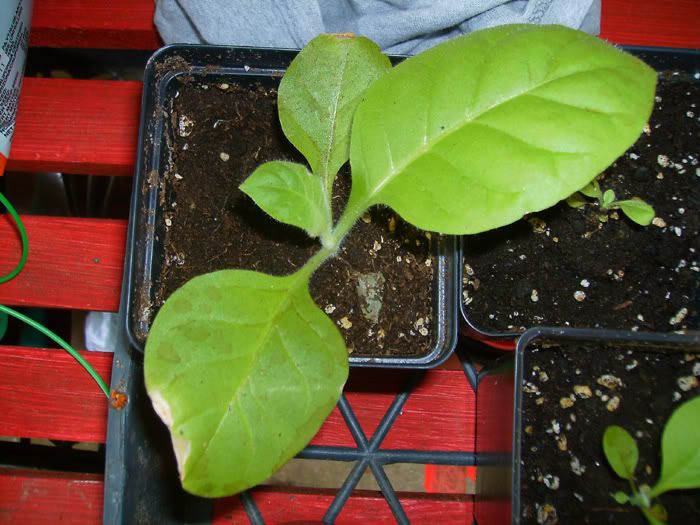
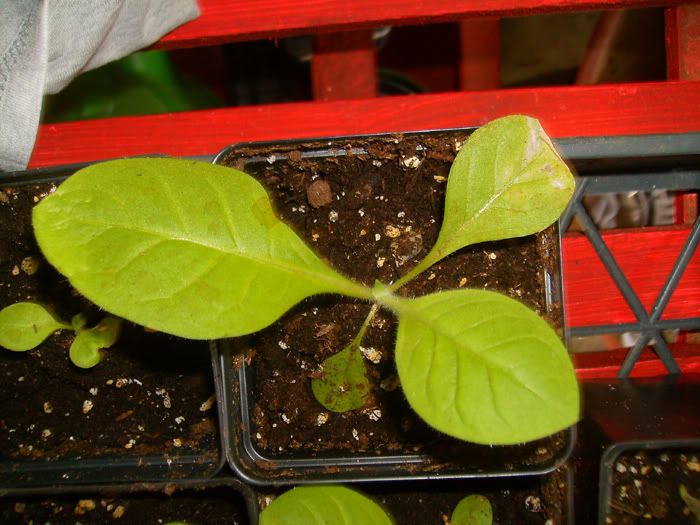
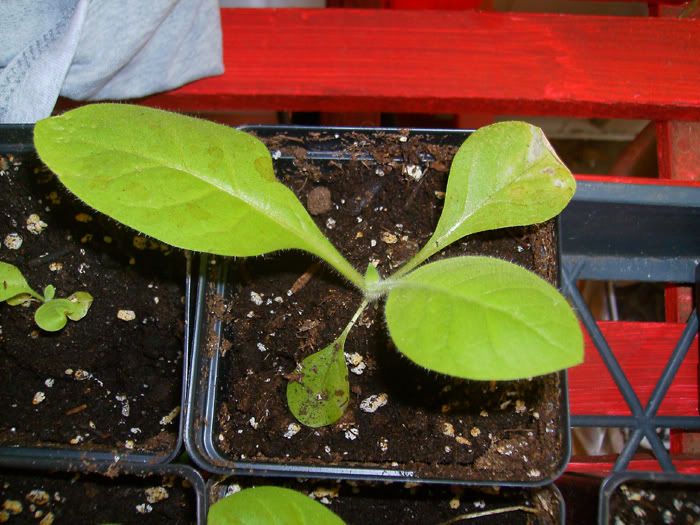
    The trays sit in a south-facing window. I'd say they get around 7-8 hours of sunlight a day in that window sill. I also try to keep the little plastic trays on them as well each day, but sometimes I have taken them off. When I first started, I noticed that mold was growing on top of the peat pellets; it appeared that the moist peat pellets, sitting in a covered tray in the sunlight, was a bit much for them, and the mold developed. Last night I just lightly scraped the mold off; it doesn't look like it really hurt anything, and the plants have started to grow.

    Anyways, I'll post pics later on today. Thanks for reading.


    Age Quod Agis

    1 Strike

  2. #22
    Join Date
    Mar 2008
    Location
    around
    Posts
    2,861
    Blog Entries
    16

    Default

    The long awaited pictures.......before continuing, you should know that I have the worst digital camera ever. Add that to the fact that I'm the worst photographer ever, and you should be considered lucky that you can even see the pictures at all.


    These are the Small Stalk Black Mammoth plants coming up.


    Long Red Leaf - the peat looks drier here than it actually is.


    Florida Sumatra - the peat pods the mold got on the most. It doesn't look like it, but there are very small sprouts on a few of these pods. I'm going to be watching them closely.

    Just watered over lunch, and will fertilize this weekend. Will post more on Monday.


    Age Quod Agis

    1 Strike

  3. #23
    Join Date
    Jan 2010
    Location
    Up shit's creek
    Posts
    1,858

    Default

    We'll be rolling blunts in no time.
    It will always be a battle a day between those who want maximum change and those who want to maintain the status quo.
    ~ Gerry Adams

  4. #24
    Join Date
    Jan 2010
    Location
    Windsor, CO
    Posts
    130

    Default

    Quote Originally Posted by Paddy View Post
    We'll be rolling blunts in no time.
    If i knew thats what we were growing I would have joined in

    Or could you mean the actual blunt cigars...nah that would be absolutely silly. We all know what's growing in the garden now.

  5. #25
    Join Date
    Sep 2007
    Location
    Denial.
    Posts
    400
    Blog Entries
    30

    Default Seeds in the PODS

    The following consists of edited notes from the past two weeks of our growing project. Rather than bog down this thread with annoying photo documentation overkill, I edited the photo links out and posted them in the “Tomacco Seed Project – Colossal Photo Thread.” The photo relevant to each comment is referenced parenthetically.

    http://www.cigarsmokers.com/threads/...852#post148852


    Sunday, March 14:

    First, I wish all of you a Happy Pi Day. My goal was to plant 3.14159265 seeds per pod in observance of what should be a national holiday. I’m all about days off and closing government offices as often as possible.

    Today the seeds went in the peat pods. For some reason, it reminds me of the “Alien” movies. As others have stated, these are very tiny, delicate seeds. To reiterate, each labeled bag contained many tiny particles that resembled coarse dust. I was not certain if the particulate matter in question was, in fact, tobacco seed; or empty husks; or magic bean stalk seeds. Fi-fi-fo-fum. Perhaps I need spectacles. (photo thread – Seeds)

    [EDIT: I took out a paragraph of silliness about enormous tobacco stalks and giants. It seemed funny at the time. Whatever.]

    The plan was to set up two trays of 30 pods for a total of 60 alien incubators. That would give me 15 pods per variety of seeds, with approximately 2-3 seeds, or seed-like specks, distributed over each pod. I buy the refill pods at Squaw-Mart for two bucks per box. There were also a few left over from seasons past. (photo thread – Peat Pellets)

    The best solution for my situation was to use aluminum half sheet pans for trays. They are easy to move around and they do not leak. Plus, I had several left-over pans in the pantry from an event so the price was right. They measure about 11 ½” by 9”, and hold about 35 jiffy pods. They are also deep enough to allow about 1 ½” from the top of the pod to the cover film. (photo thread – Pod Tray 1)

    I hydrated the pods with a very weak mixture of filtered water and Miracle Grow liquid fertilizer. The rate was about ¼ of the recommended ratio for the typical feeding solution. I hope I don’t fry the little guys. Ain’t nothin’ worse than a tray full of fried little guys… Some of the older peat pods did not absorb the solution, so I changed them out. (photo thread – Pod Hydration Failure)

    One of the best methods to sow mini-seeds is to fold card stock and funnel the seeds into place. This is perfect for carrots, broccoli, etc. I hold the card at approximately 10 – 12 degrees above the horizon and gently tap the edge of the card to roll the seed down the crease. (I suggest using a bullet level and protractor to get the angle just right. That should take up about three hours of your free time.) (photo thread – Seed Slide)


    The seeds seemed to bounce down the ramp rather than rolling smoothly. I am sure I lost a few in the process. It’s OK; those were probably some kind of Mexican Jumping Tobacco anyway. Our good friend mrtr33 is an intelligent, well-educated individual. He claims to have sent only a small quantity of each variety to each of us. I believe his extensive education and academic acumen is concentrated in an area other than arithmetic. Holy Crap, man! There must be forty seeds in these packs. Maybe it just looks like forty seeds. Seriously, my eyes are bugging out from focusing.

    The seed round-up:

    Argentine: These remained from last year’s attempt so there are not that many of them. They are small, but manageable.

    Florida Sumatra: I had a hard time with these, but there are enough to place two or three seed-like bits into each pod.

    Small Stalk Black Mammoth: The mammoth seeds were easy to handle in comparison to the others and they seemed to be better formed.

    Long Red Leaf: No problem with these and there were plenty to go around.

    As you can see, I covered the trays with translucent ‘press and seal’ wrap. It sticks to the aluminum like glue. This provides a greenhouse environment with partial sun, high humidity, and some degree of temperature moderation by limiting air exchange. Equally important, it keeps out floaters like mold spores and weed seeds. (photo thread – Covered Trays)

    The weather has been unusually cold in for March, but I think we have seen the last of it for this winter. [UPDATE: Temps this week were mid 50’s to low 70’s. That’s about ten degrees cooler than average for this time of year down here.]


    Monday, 03/15 – Friday, 03/19:

    Not much happened during the week - at least, not much that I could see. The wrap cover seemed to keep the humidity high enough that the pods remained moist. I sprayed them with a fine mist twice during the week. That was the only time I looked at the trays other than to shuttle them out during the day and back indoors at night.

    Saturday, 03/20:

    Today I exchanged the translucent wrap for clear plastic wrap to allow more sunlight on the pods. Many of the seeds have germinated and tiny sprouts are clearly visible. With a magnifying glass I can see several more that are growing, but have not yet shed the seed husk. This should provide a better evaluation of my seed distribution skills.


    Here are the germination results so far (photo thread – Sprout Series):

    Argentine: Germination on 12 of 15 pods.

    Florida Sumatra: Germination on 9 of 15 pods.

    Small Stalk Black Mammoth: Germination on 13 of 15 pods.

    Long Red Leaf: Germination on 9 of 15 pods.

    Summary:
    My sowing skills are, well… lacking. By dumb luck some seeds fell into the center of the pods. I found a few on the mesh edges of the pod that actually sprouted. All I can do at this point is to wait and see. If I try this next year, I will use a paper funnel to better guide the seeds into place and keep the jumping beans on target. Alternatively, I may try picking up a few seeds at a time with a cotton swab, clipping the swab, and placing the seed-swab on the pods. Or I may just dump the entire bag into the tray…

    It should be interesting to see how many sprouts make it to maturity. My guess is that about half will peter out before growing primary leaves. I think this crop is off to a decent start, but it is short of the typical 80% level. My eyes hurt. (photo thread – Nice Seed Placement)


    Tuesday, March 23, 2010

    Today I removed the cover wrap and put the mini-bacco plants outside in a protected area. I added a small amount of fertilizer solution to the bottom of the trays and gave the pods most of the day to absorb it. The pods are still saturated so I ended up pouring off about half of the mixture. I still don’t want to spray the plants directly with fertilizer. Perhaps next week they’ll look stronger. The photos below show the progress so far. You can see a few that germinated and then died off. (photo thread – Seriously?)

  6. #26
    Join Date
    Mar 2008
    Location
    around
    Posts
    2,861
    Blog Entries
    16

    Default

    Nice call on the plastic wrap. I'm sure that helps out quite a bit. Also, perhaps you've already mentioned this and I overlooked it, but how are you hardening them (setting them outside during the day)? Are they in shade, but just exposed to the elements? Are they in full sun? What is the fertilizer mix ratio you are applying?

    Awesome!


    Age Quod Agis

    1 Strike

  7. #27
    Join Date
    Sep 2007
    Location
    Denial.
    Posts
    400
    Blog Entries
    30

    Default

    Race to the Clouds -
    Yes, the Mammoth variety seems to have taken very well and most seedlings seem to be vigorous. Both the Sumatra and Argentine have several viable seedlings. The Red Leaf plants are struggling. They appear weak and spindly... much like me. <sigh>

    Fertilizer Rate –
    I used Miracle Grow liquid fertilizer for the initial pellet hydration at about ¼ teaspoon per quart. I will increase the rate by ~50% on the next feeding, and then an additional ~33% for all weekly feedings. That gives me an approximate rate of ½ tsp. per quart, or 1 1/3 tbsp. per gallon for regular diet. Alternatively, I may just dump the jug in the middle of the plot and hope for rain.

    Another consideration is the quality of water used in the propagation phase. As I understand it, tomacco will not tolerate chlorine until it is established. The same goes for all the nightshades, I guess. I used filtered water – nothing special.

    Question: Does anyone have a recommendation for tomato fertilizer? There is a similarity in nutrient requirements.

    Hardening Off –
    Based on both the material you provided in the info post and some additional reading, I may be jumping the gun on setting the seedlings outdoors. They are in a protected cove that receives only indirect sunlight, but they are still subject to wind, temperature swings, and other forms of outdoor mayhem. The jury is still out on the quality of that decision.

    Next Phase –
    I have some time to decide how to transplant the seedlings. I think stepping them up from pods to peat pots may be a good idea. That will allow some measure of control over soil, water, and nutrients. Equally important, it will allow for full root development. I have an idea that may be more than a few critters lurking in the soil here.

    I think I’ll be lucky to get two or three specimen plants from each variety. My money is on the Mammoths for survival… unless there’s a sudden new ice age.

  8. #28
    Join Date
    Sep 2007
    Location
    Denial.
    Posts
    400
    Blog Entries
    30

    Default Mold

    mrtr33 - I noticed your Sumatra had a bit of mold on the seeds and in the pellets. I had a few with the same condition. The other varieties are not affected. It appears that it could be a moldy batch of seed from the supplier. Crud.

  9. #29
    Join Date
    Mar 2008
    Location
    around
    Posts
    2,861
    Blog Entries
    16

    Default

    Quote Originally Posted by Smoked! View Post
    Fertilizer Rate –
    I used Miracle Grow liquid fertilizer for the initial pellet hydration at about ¼ teaspoon per quart. I will increase the rate by ~50% on the next feeding, and then an additional ~33% for all weekly feedings. That gives me an approximate rate of ½ tsp. per quart, or 1 1/3 tbsp. per gallon for regular diet. Alternatively, I may just dump the jug in the middle of the plot and hope for rain.

    Another consideration is the quality of water used in the propagation phase. As I understand it, tomacco will not tolerate chlorine until it is established. The same goes for all the nightshades, I guess. I used filtered water – nothing special.
    After much thought about my specific situation, I've decided not to fertilize the peat pods. My primary concern is burning these plants up. I've read in other places that it's best these tobacco seeds be brought up in direct sunlight. I'm worried that their early life may be hindered in the sun with the addition of a fertilizer.

    Good call on the water - that makes sense to me.

    Also, I'm not going to start hardening these plants for a few more weeks. Ideally, I won't transplant until they are clearly individual seedlings.

    Quote Originally Posted by Smoked! View Post
    Question: Does anyone have a recommendation for tomato fertilizer? There is a similarity in nutrient requirements.
    I do, but I can't recall what it is. It's another one of those slow-release, in-ground fertilizers (as opposed to a fertilizer for potted plants). I'll add it to the beds once I get those in place. Supposedly, it is something I only have to add once, then I can forget about it. I'll find out what the name of the stuff is, and post it.

    Quote Originally Posted by Smoked! View Post
    mrtr33 - I noticed your Sumatra had a bit of mold on the seeds and in the pellets. I had a few with the same condition. The other varieties are not affected. It appears that it could be a moldy batch of seed from the supplier. Crud.
    Yeah, the Sumatra did. I guess I was thinking it was a result of the sunlight hitting the covered tray, and the condensation was too much, and mold formed. I never thought the seeds themselves could be moldy. I've taken the trays off, and don't see any more mold.

    I have a few more sprouting up. I'm probably only going to keep a few of the Black Mammoth's, and give the rest to the local garden store that's helped me so much with little tips and advice in getting me started.

    I'll post pics and an update on my growing experiences (what isn't posted here) a bit later on.


    Age Quod Agis

    1 Strike

  10. #30
    Join Date
    Sep 2007
    Location
    Denial.
    Posts
    400
    Blog Entries
    30

    Default A Little Progress

    03.26.10

    Today, the first pairs of secondary leaves appeared on three of the four varieties. The Sumatra is a little behind the others in development.


    03.30.10

    All four varieties now have tiny secondary leaves and are progressing ever so slowly. The Black Mammoth seedlings are the most vigorous of the plants so far. The temperature has dropped again this week. We had a strong storm front push through yesterday which brought cooler, drier air and low temps near fifty. For late March in FL, that’s cold!


    03.31.10

    The low temp this morning was forty-seven. I know that’s just a warm spring day for all you Yanks up in Pennsyltucky, but here it’s an arctic blast. It was so cold that I had to put on socks. Even the little tomaccos were shivering!

    Normal temps should be in the mid-sixties to low eighties by the end of March. I think the cooler air is stalling plant development slightly. If these seedlings were sown outside in the soil, they would have already failed.

    This weekend I plan to place the seedlings into direct sun for a couple hours each morning. After a week or so, they should be hardened off enough to take full morning sun. It should be interesting to see how quickly they respond to direct sun energy. Will they fry or accelerate? I want to see a couple more leaves kick out before I leave them out in full sunlight all day.


  11. #31
    Join Date
    Mar 2008
    Location
    around
    Posts
    2,861
    Blog Entries
    16

    Default

    So, I've been slacking the last week. I meant to get these up last Thursday, because today, the plants look completely different.


    The Small Stalk Black Mammoth. The one in the bottom right is Argentina. These plants, far and away, are the most hearty of the bunch.


    Long Red Leaf


    Florida Sumatra

    I should note that when I took these photos, it was last week. I watered them immediately afterward. The plants really do look much better this week than they did then (last week).

    I also wanted to update the thread with what kind of fertilizer I'm going to be using once I get the plants in the ground. This is still probably at least 45 days away, but it is something I wanted to start thinking about now. The fertilizer is called Plant-Tone, and can be found at your local gardening store. Probably won't be able to find it at a big box store, but you might. Espoma also makes a Tomato-Tone, but I can't find it anywhere locally.

    Just thought I'd share. I'll try to get updated pics up soon.


    Age Quod Agis

    1 Strike

  12. #32
    Join Date
    Sep 2007
    Location
    Denial.
    Posts
    400
    Blog Entries
    30

    Default Update - 04.07.2010

    I snapped a few photos showing the progress to date. Clearly, the Mammoth seeds have done best in the germination phase, but they are smaller than the other plants. Time to thin them out? Maybe... The other three varieties are about equal. See for yourself:

    Argentina


    Black Mammoth


    Florida Sumatra


    Long Red Leaf

  13. #33
    Join Date
    Sep 2007
    Location
    Denial.
    Posts
    400
    Blog Entries
    30

    Default Pods to Pots - 04.22.10

    It’s a great day for America!

    Today, I stepped the tobacco plants up from pods to peat pots. Check out the survivors:

    Argentina –


    Florida Sumatra –


    Black Mammoth –


    Long Red Leaf –


    My first thought was to choose two or three of each variety and carefully cultivate only the finest of the seedlings. That would probably be the most efficient, well reasoned, and easily managed solution. It would require a minimum of supplies, only little effort, and an economic expense of time.

    With that understanding, and while carefully considering my options, I cracked open a cold one, counted up the supplies available (see below)… and decided to make an afternoon of it. All these little guys went in new containers today. No doubt, there will be consequences. Don’t let your friends drink and farm.

    As you can see, I picked up some potting soil with a slow-release fertilizer. Seems rather like cheating, doesn’t it? The off-brand was priced roughly forty percent less than the Miracle brand. Additionally, there was only one remaining sleeve of the large size peat pots and it was priced to move, so I loaded up my cart and cheap-skated my way to the register. Here are the goods:


    Potting is simple, repetitive process. I find it to be relaxing. It must have been quite a bit warmer than I imagined. A full six pack of my favorite carbonated barley-based beverage evaporated. Chalk it up to angel’s share. Check out the roots pushing through the netting on the pod.


    Most of the pods have a dominant seedling that will remain when the others wither or are plucked out. There are a couple considerations. For example, the Mammoth seeds hit very close to the target of eighty percent germination and most of the pods now have strong seedlings. Once they get through the transplant shock, I can remove the weakest ones. The other varieties are less vigorous.

    In most cases there is a single viable seedling. However, there are a several doubles that may both survive if I can separate them. Siamese… I mean ‘conjoined’ tomacco twins? Yeah, kinda… sorta. Look:

    From the top left, working clockwise we have: twins, twins, regular, regular, weakling, and an empty. What to do, what to do… that’ll be tomorrow’s post.


  14. #34
    Join Date
    Sep 2007
    Location
    Denial.
    Posts
    400
    Blog Entries
    30

    Default Twins split - from Sat., 04.24

    Here’ the split experiment. These are the Florida Sumatra plants. I had only a few that survived, so I wanted to try to salvage as many as I could by splitting the doubles.


    You can see that the siam… I mean, conjoined plants are really only intertwined at the feeder root level. The stalks are clear. To further complicate things and senselessly waste more bandwidth on photos, I decided to create an additional component to the experiment. Instead of splitting both twins, I will allow one pair to duke it out for the Championship of the Known Universe. It will be the World Tomacco Entertainment Smackdown. (Prize valid only in sectors where the Known Universe may be legally awarded, or a similar substitute prize may be awarded at the judge’s discretion. For those of you scoring the contest at home - please, no wagering.)

    Yeah. I know. Friends don’t let friends drink and farm. Whatever.


    Here’s the split pod. You can see the tap root is intact. If they can survive the initial shock and transplant stress, they should do as well as the other plants.


    Here are the marked split containers.


    But wait, there’s more!

    Check out this clinger. It looks like it’s climbing up the pod to get back on top. Maybe it’s some kind of ninja tomacco…


  15. #35
    Join Date
    Mar 2008
    Location
    around
    Posts
    2,861
    Blog Entries
    16

    Default

    So, I'm totally getting shown up here. Smoked! - you're the man.

    Attached is my pitiful attempt. I'm kind of embarrassed. In my defense, I have yet to use any fertilizer. And we have a newborn at the house, who takes up a good bit of time. But seeing that this is the only garden we'll have in the backyard (no veggies this year), it will be my primary focus.

    Mostly Black Mammoth.


    My potting mix of choice.


    Instead of the more precise, razor-blade cut to separate twins, I'm lazy. With all my transplants, I took the netting off - I remembered from last year that this encouraged root growth a bit better if it wasn't contained. I feel like this netting, over time, would disintegrate anyway, but I wanted to give the plants as much of a chance as possible.


    Finished product. We ended up with one Argentina, one Long Red Leaf, one (small, probably diseased) and 13 Black Mammoths. Not sure what happened. I was really hoping for more Long Red Leafs, and especially more (and healthier) Florida Sumatras. Hopefully, it will come along in the next few weeks.


    Long Red Leaf, Florida Sumatra, Argentina


    So, as I mentioned before, this will probably be my only garden this year. I'd like it if I had 8 salvageable plants in two weeks - large enough to plant. I'm still holding off on fertilizer, rather holding out until I get them into the ground.


    Age Quod Agis

    1 Strike

  16. #36
    Join Date
    Sep 2007
    Location
    Denial.
    Posts
    400
    Blog Entries
    30

    Default

    Nice, Mark. Looking good so far. The little sprouts will take off once they get more soil and space, as well as a dose of fertilizer. I have more pics, but no opportunity to post just yet.

    Congrats again on the new arrival!

  17. #37
    Join Date
    Mar 2008
    Location
    around
    Posts
    2,861
    Blog Entries
    16

    Default

    It's been 2 weeks, so I thought I'd provide an update.

    So far, things are going good. If I had to do it over again, I think I would have exposed the plants to the elements a bit sooner than I did. I didn't get them outside until I repotted them - this was a mistake. I also learned a few things as well.

    For one thing, I immediately encountered an aphid problem. This was solved (as far as I can tell) by spraying the plants with generous portions of tobacco water. I broke up a cheapie cigar, boiled it in water like loose-leaf tea, and after it cooled, filtered the tobacco out for the brownish, pungent water. I also had a problem with slugs. Unfamiliar with these pests, I just picked the tray of pots I had them on up off of the ground at night - prime time for slug feedings. Remnants of these pests can be seen on the images below.

    My tobacco garden:


    Argentina (one plant - two pictures):
    Notice the pointy tip of the leaf - so far, that's the best way I've been able to tell it apart from the others.


    Black Mammoth (two plants - one picture):
    These have rounder tips on the ends of their leaves.


    Florida Sumatra:
    Okay, don't laugh. The fact that I got ANYTHING from this batch of seeds was amazing. And it has grown substantially since I potted it, despite it's neighbors dwarfing it. I will probably keep this in the pot for a while before transplanting it to the ground. But so far - so good.


    Long Red Leaf (one plant - two pictures):
    You can see how much smaller the Florida Sumatra is in comparison (it's on the left). The ends of their leaves are somewhere in the middle between the roundness of Black Mammoth and the points of the Argentina.


    Trouble plants: I'm not sure what to make of these. Here's what I think happened. A few days after I re-potted these plants, I kept them in the sun - it wasn't too hot (maybe low-80's), and I thought it would be okay. My guess is that the plastic got too hot, and scorched the still-virgin leaves that touched the edges of the plastic pots. They continue growing okay, but look worse and worse. Hopefully, the rest of the plant will outgrow these and I can trim them off. We'll see. There are a couple other plants that have a similar look to them, but these were the most prevalent.

    Black Mammoth:


    Smoked has a MUCH better tobacco garden than I do, however. Care to provide insight on identifying characteristics of the plants?

    Thanks for reading............
    Last edited by mrtr33; 05-14-2010 at 02:44 PM. Reason: spellling/communication/coherence


    Age Quod Agis

    1 Strike

  18. #38
    Join Date
    Sep 2007
    Location
    Denial.
    Posts
    400
    Blog Entries
    30

    Default Mid-May Update - 8 Weeks of Progress... and beer... and cigars

    Cues to plant I.D? … Now, that’s a question for a tomacco professional. Let me look more closely at each variety and I’ll try to come up with a few identifiers. They only way I can keep track currently is by segregating the varieties when they’re in the early stages and by marking the containers when they’re ready for step-up. When they go in the ground, I’ll simply note what is in each row. I may need to hang a scarecrow to keep birds and wildlife away. I’m thinking something like this:


    Seems to be working great in the Gulf. …or maybe a poster of mailman’s former sig tag.


    A few notes so far:
    1. I like the aluminum tray with a translucent ‘sticky wrap’ cover for seed germination beds. I’ll do that again, but I may opt for the larger size to accommodate an intermediate step-up.
    2. Step-up to peat pots more quickly, or sow directly into them next year.
    3. Step-up to larger containers. The 5 inch peat pots were ok, but the really small ones were a waste of time. For a second step, if necessary, I believe the additional space in the one gallon pots will allow for better root development and help form stronger, straighter stalks. These plants spread out quickly and need lots of space.
    4. Set out in direct sun earlier for hardening off.
    5. Apply fertilizer carefully in the early stages, but feed them regularly once they are established. They are heavy feeders and suck up every available nutrient.
    6. Plan ground space early. It appears that these guys are going to need much more room to spread out and fully develop than I anticipated. At this point, there is too little space in the plant bed to accommodate them all. I may have to chop up part of the yard.

    Attached are some of the latest photos. For some reason, I can’t locate all the images. It is likely I filed them incorrectly when I downloaded them from the camera. It’s no great loss. Check out the tomacco pr0n:

    Remember the ‘wishful thinking’ photo of the lone BM that I put in a one gallon container on a whim? How do you like her now? If we do this again, I think using large containers for step-up and hardening off may be the plan for next year. I think they may be easier to move around and will have a better chance to develop strong roots. Note the leaf damage on the edge of the plastic container. It looks just like mrtr33’s.

    May 08:


    May 18:


    Below is a smaller BM that I pulled out of the tray. It is in one of the small peat pots and desperately needs more space. Notice the yellowing leaves to the right and the small brown leaves on the top left. These need to be removed along with any other inferior leaves to promote better stalk and leaf formation. You can see that the spread on this little guy is already more than one foot. Are we stepping into the Little Shop of Tomaccos?


    Here is a shot of the FS tray. Note the plants on the bottom left. Those are the TWE Smack Down contestants. The ones behind the ruler on the left are the split plants. They seem to be doing just fine. In the foreground, you can see the plant on the bottom right has leaf damage from the edge of the pot similar to the effect mrtr33 pointed out. The leaves seem to damage easily regardless of the material they contact. Note to self: Fill pots to rim to prevent leaf contact.


  19. #39
    Join Date
    Mar 2008
    Location
    around
    Posts
    2,861
    Blog Entries
    16

    Default

    Really cool photos, Smoked!

    I agree, I think next year I'll probably still start the seeds in peat pods (for space issues), but I'll transfer them much much sooner than I did this year (and probably won't have a baby keeping me from doing so next year - well, we'd better not 
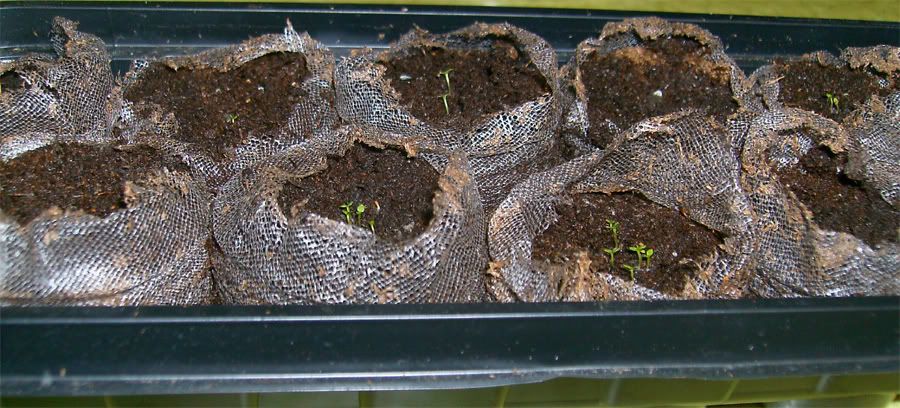
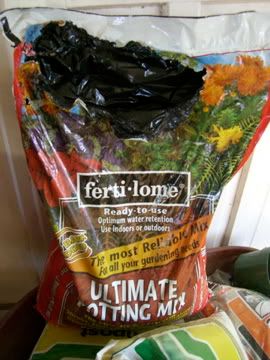
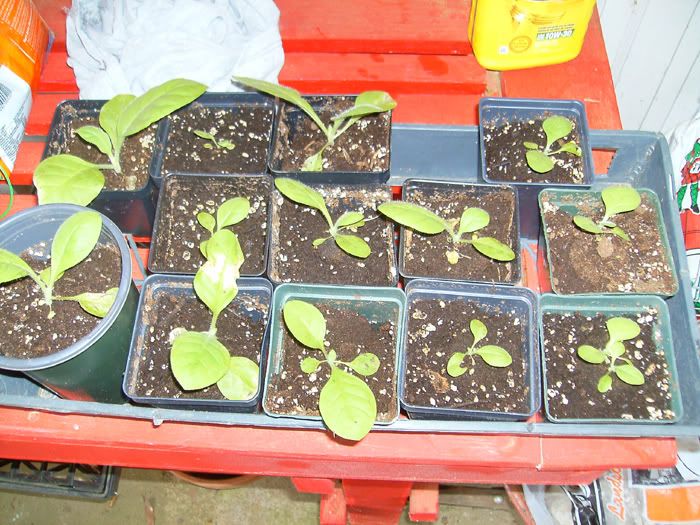
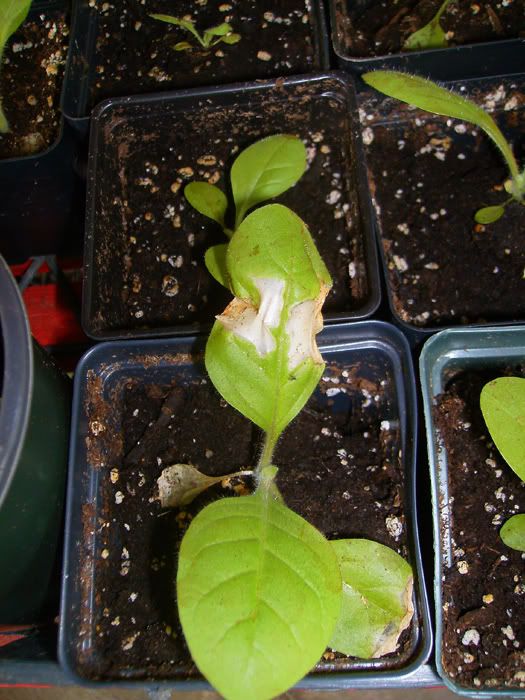
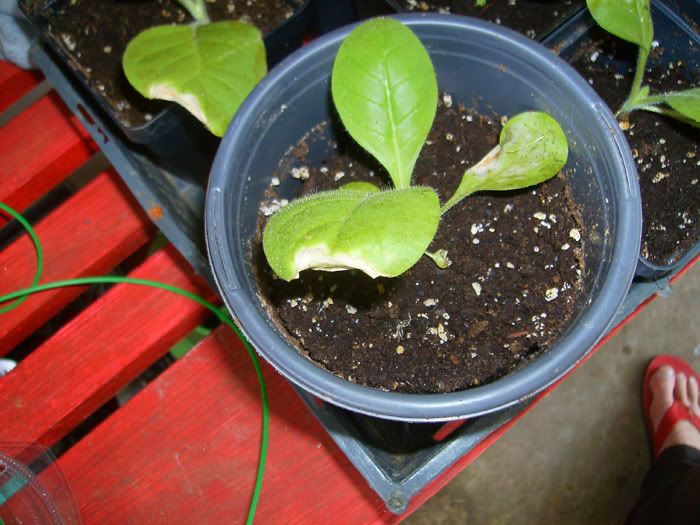
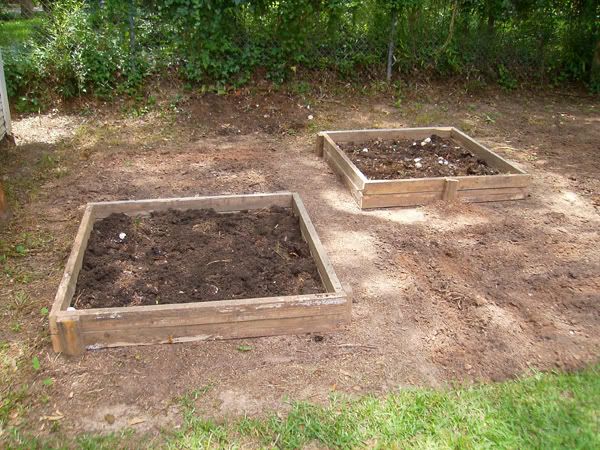
). I also totally agree on filling the pots up to the top, but I guess my only reservation is the depth of those pots. I guess I'm worrying that the potting soil at the bottom of that gallon pot not being utilized. I might get shorter, wider pots for that purpose.
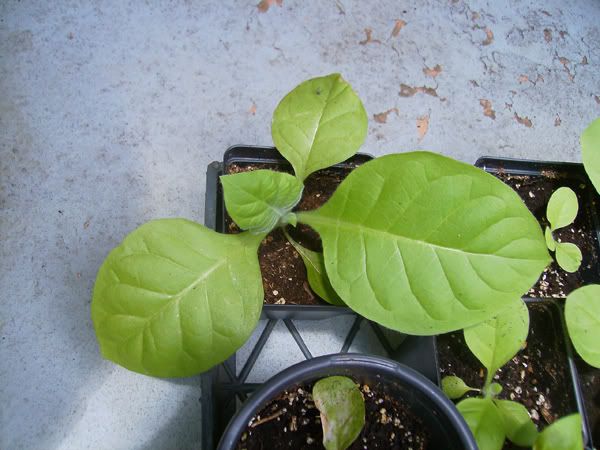
    I will agree that these plants grow incredibly quickly. I haven't added any fertilizer to my plants (besides what may be in the potting soil when I repotted), but that's about to change, as I prepare my beds for transplanting the plants into the ground. Since I posted the pictures above, I would guess each plant has almost doubled in size, simply because they have more soil and space to grow. I also remember reading somewhere that tobacco drains the nutrients of their soil very rapidly - because of this, the beds I'm building will only contain the soil I want them to grow in, and not any part of the soil from the ground. I'll try to get pictures of the beds together soon. Probably won't get any more photos of the plants for a little bit.


    Age Quod Agis

    1 Strike

  20. #40
    Join Date
    Mar 2008
    Location
    around
    Posts
    2,861
    Blog Entries
    16

    Default

    What a difference a week makes. No fertilizer still. I'd imagine this growth will slow the larger the plants get, and outgrow their tiny little pots.

    Argentina - May 14:


    Argentina - May 21:


    Florida Sumatra / Long Red Leaf - May 14:


    Florida Sumatra / Long Red Leaf - May 21:


    The whole tobacco garden. It's amazed me how quickly these have grown. The weather has been very cooperative, with rain only 2 of the last 10 days or so. Even still, most days get at least a little bit of sun. Some of these plants are probably ready to be transferred, but there are some that are probably still a little small to be transferred; namely, the Florida Sumatra plant. My other concern right now is that the leaves are really starting to spread out, so the larger plants are shielding the light from the smaller plants. I really like the tray I have them in now, and would rather not upgrade to larger pots before transferring them into the ground.


    The planter beds - only about half full. I'm emptied my compost bin from last year as the base of these beds. Also found about a gazillion worms. I'm filling the rest up with compost. I forget the name brand now, but it's something from a garden shop, and not one of the big box stores. It's at this time that I'll add fertilizer for the first time as well. Basically, I just put 2 - 2X4's on top of each other. Originally, I was worried that there would be too much space between the boards, for the compost to leak out of. As it turns out, this is not the case. At this point, I probably won't finish these beds until Sunday at the earliest. I'm going to be checking the weather to try to decide on the best time to transfer my plants to the ground. I'd rather not risk subjecting the new transfers to a torrential Louisiana rainstorm.
    I subscribe to the Square Foot Gardening principle. So I built these 4X4 beds, and will section them each off into 4 - 1 square foot sections, one for each plant. The hope is that with using such rich compost, and with so much space, the plants should thrive. I've also chosen to use a time-release fertilizer, so I won't have to worry about that so much. The soil here in our neighborhood is very high in clay content, and not great for gardens. Hopefully, this gets around that.


    Observation: the below plant is the Long Red Leaf. As you can see, the three larger leaves toward the top look strong. The bottom two, however, are yellowing and/or otherwise fading. I should probably pick these off, to support growth of the other leaves. I noticed this last year with my plants as well. the bottom leaves seemed to just yellow and die. I just picked them off.


    Age Quod Agis

    1 Strike

Thread Information

Users Browsing this Thread

There are currently 1 users browsing this thread. (0 members and 1 guests)

Bookmarks

Posting Permissions

  • You may not post new threads
  • You may not post replies
  • You may not post attachments
  • You may not edit your posts
  •